
How to Recover Deleted Files on Windows Without Any Paid Tool
Last year, I accidentally deleted an entire folder of client project files. Not just moved them to the Recycle Bin — I had shift-deleted them. Gone. Like they never existed. My stomach dropped.
My first instinct was to Google “file recovery software,” and the first five results were all paid tools with “free trials” that let you see your files but hold them hostage until you pay $40–$80 to actually get them back. That felt like a hostage situation, honestly.
But then I dug deeper, stayed patient, and recovered almost everything — without spending a single rupee. Here’s exactly what I did, and what you can do too.
First, Stop Using That Drive Immediately
I know this sounds obvious, but it’s the most important thing most people get wrong.
When you delete a file, Windows doesn’t actually erase it. It just marks that space as “available” and removes the pointer to it. The actual data is still sitting there — until something new gets written on top of it.
So if you keep downloading stuff, saving files, even just browsing the web (which caches data), you’re slowly overwriting the very files you’re trying to recover. I’ve seen people install recovery software on the same drive where their deleted files were. That’s like trying to rescue someone by parking a truck on top of them.
If the deleted files were on your C: drive (system drive), work fast. If they were on a secondary drive or USB, just stop using that drive immediately.
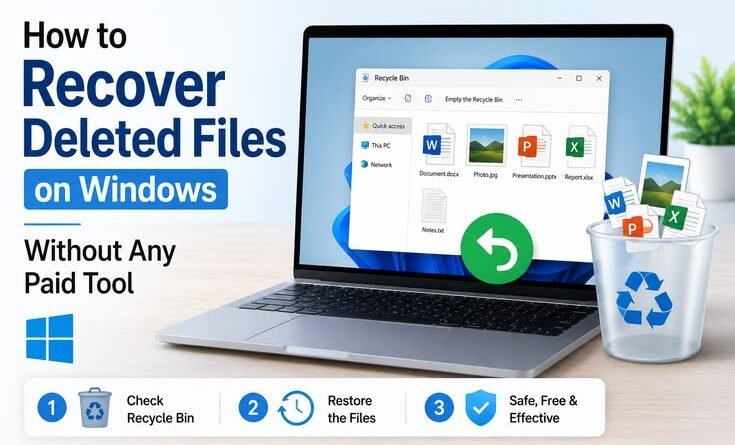
Step 1: Check the Recycle Bin (Seriously, Don’t Skip This)
I know you probably already checked. But humor me.
Sometimes files end up in the Recycle Bin without you realizing it — especially if a batch delete happened or someone else used your PC. Open it, sort by “Date Deleted,” and look carefully. Right-click → Restore to put them back exactly where they were.
Also check if your Recycle Bin is set to auto-delete items older than 30 days — that’s a Windows 11 default setting under Storage Sense. If it was enabled, files deleted more than a month ago might already be gone from there too.
Step 2: Use Windows File History (If You Had It On)
Windows has a built-in backup feature called File History that most people never set up — and then cry about it later (myself included, the first time).
But if someone did set it up on your PC, here’s how to use it:
- Open File Explorer and navigate to the folder where the deleted files were.
- Click on the History button in the toolbar (Windows 10), or right-click the folder → Show more options → Restore previous versions (Windows 11).
- A timeline appears showing snapshots of that folder.
- Browse through the versions, find your files, and hit Restore.
I recovered a deleted thesis draft this way once. The feeling of seeing that file pop back up is genuinely one of the best tech moments you’ll ever have.
If File History wasn’t set up — don’t worry, keep reading.
Step 3: Try the Previous Versions Feature (Shadow Copies)
Even without File History, Windows sometimes creates shadow copies of your files through System Restore points. This works especially well for files on your C: drive.
Here’s what to do:
- Navigate to the folder where the deleted file was (the parent folder, not the file itself).
- Right-click on the folder → Properties.
- Click the Previous Versions tab.
- If Windows has any restore points saved, you’ll see a list of earlier versions of that folder.
- Double-click a version, find your file, and copy it out.
This doesn’t always work — System Restore has to have been active, and it doesn’t run constantly. But it’s saved me at least twice, completely for free.
Step 4: Use Recuva (Free, Trusted, and Actually Works)
If the above methods didn’t help, it’s time to bring in a proper recovery tool. And the best free one I’ve consistently used is Recuva by Piriform (same people who make CCleaner).
It’s completely free. No “pay to restore” nonsense. Here’s how to use it:
- Download Recuva from piriform.com/recuva — use a different device or drive to download it if possible.
- Install it on a drive other than the one you’re recovering from.
- Launch Recuva and run the Wizard.
- Select the type of file you lost (documents, pictures, etc.) or choose “I’m not sure.”
- Tell it where to look — the specific folder or drive.
- Let it scan. For a deep scan, enable Deep Scan (it takes longer but finds more).
- Files are color-coded: green = excellent condition, yellow = okay, red = poor chance of recovery.
- Select the ones you want and restore them to a different drive.
I’ve recovered Word documents, photos, even a corrupted video file using Recuva. It’s genuinely impressive for a free tool.
Step 5: Try Windows’ Built-In winfr Tool (For Power Users)
Not many people know this, but Microsoft released a free command-line tool called Windows File Recovery available in the Microsoft Store. No cost, no trial limits.
It’s not as beginner-friendly as Recuva, but it’s powerful. Here’s a quick example:
- Install it from the Microsoft Store (search “Windows File Recovery”).
- Open Command Prompt as Administrator.
- Run a command like:
winfr C: D:\RecoveredFiles /regular
This scans your C: drive and saves recovered files to a folder on D:. You can also use /extensive for a deeper scan.
The catch: it’s command-line only, so not ideal if you’re not comfortable with that. But it’s completely free and comes from Microsoft itself, so there’s no trust issue.
Step 6: TestDisk and PhotoRec (For the More Technical Folks)
If you’ve lost files from a formatted drive or a severely corrupted partition, TestDisk and its companion tool PhotoRec are open-source legends in the recovery world.
PhotoRec (despite the name) recovers all types of files — documents, videos, audio, archives. It’s free, runs on Windows, and has recovered data off drives that other tools gave up on.
Download from cgsecurity.org. It looks old and intimidating, but there are plenty of YouTube walkthroughs. I used it once on a failing external hard drive and got back about 70% of the data. Not perfect, but free.
Common Mistakes That Kill Your Chances

A few things I’ve seen people do that make recovery much harder or impossible:
Saving new files on the affected drive. Again — this overwrites the very data you want back. Even installing a recovery tool on that same drive can do damage.
Running Disk Cleanup or Defragmentation. Both of these can permanently destroy deleted file remnants. Never run them on a drive you’re trying to recover from.
Waiting too long without acting. The longer your computer runs and uses that drive, the more data gets overwritten. Act fast.
Trusting “100% recovery guaranteed” paid tools. Honestly? Some of them don’t perform better than Recuva. I’ve tested a few. The expensive ones aren’t always better.
Not checking the Office AutoRecover folder. If you lost a Word or Excel file, check C:\Users\YourName\AppData\Roaming\Microsoft\Word\ — Office saves backup copies there automatically. Saved my work more times than I can count.
What If Nothing Works?
Here’s the honest truth: if a file has been overwritten, no free tool — and honestly, no paid tool either — can bring it back. That data is gone at the software level.
At that point, your options are professional data recovery labs, which use hardware-level techniques to read platters directly. These services cost anywhere from $300 to $1500+, and they’re usually for critical situations like failed drives or SSDs with damaged controllers.
For most everyday file losses though? The methods above work surprisingly well.
Set Yourself Up So This Never Hurts Again
Recovering files is stressful. Setting up a backup system takes 15 minutes and eliminates that stress permanently.
- Turn on File History — plug in an external drive, go to Settings → System → Storage → Advanced Storage Settings → Backup Options, and set it up.
- Use OneDrive — Windows 11 has it built in. Enable the “Recycle Bin” in OneDrive settings and it keeps deleted files for 30 days even after you clear your local bin.
- Free Google Drive or MEGA — for documents, photos, anything important.
Future you will be incredibly grateful.
Losing files feels catastrophic in the moment, but most of the time they’re recoverable — especially if you act quickly and don’t panic-install things on the wrong drive. Start with the Recycle Bin and Previous Versions, then move to Recuva or Windows File Recovery if needed. These tools are genuinely capable, and they don’t cost a thing.
The main lesson I’ve taken from my own data-loss disasters: the best recovery tool is the one you never have to use, because you backed things up. But until then — now you know exactly what to do.


